This blog post will take you through the basics of the functionality.
We start by sharing our application resources of the build VBCS web application. In the security properties we toggle to enable Resource sharing.

Once this is done, we go to the home screen and create a new mobile application.
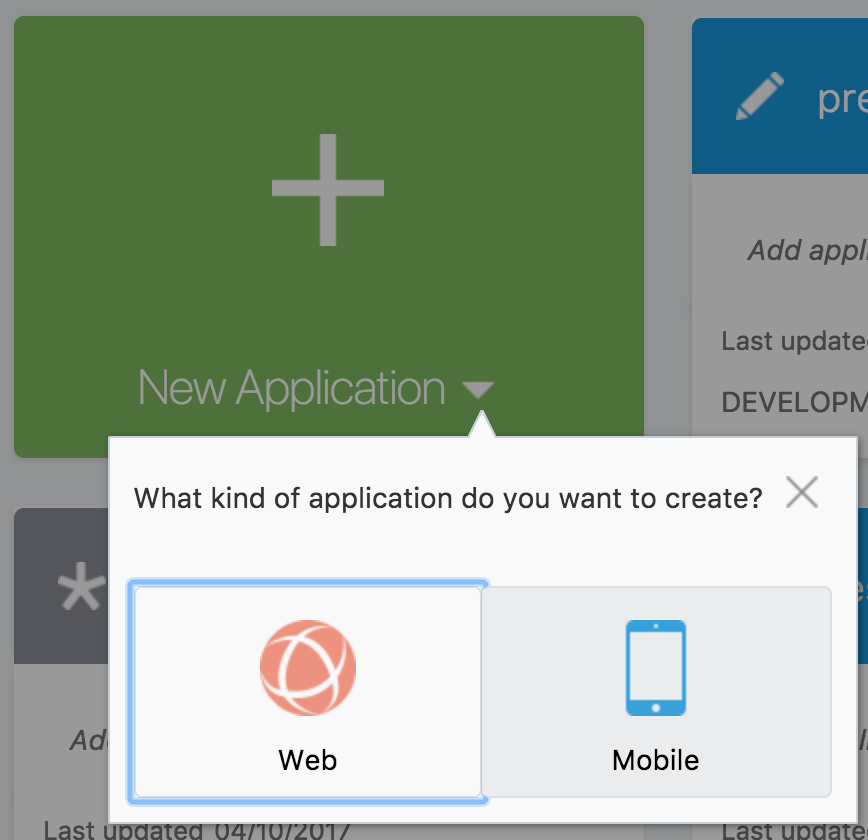
This action will open MAX within VBCS. In the create application wizard we choose the
Screen with Top Tabs as basic template.

In the next step we can give the application a name (Screen Title) and already configure how many tabs we want the application to have and specify the names. Lets start with the Tracks and Speaker page from the earlier created application.

In the next step of the wizard, for the content we select ‘List Content’ as screen.

We have completed the wizard, so lets click the green ‘Create’ button to create the mobile app.

On the next page, we want to add data to the generated app and page, so we choose the ‘Add Data’ option.

For this we need to select a layout again, so to display the data it feels ok to add 4 fields per row on the page, we select the top right option and press Next.

Now that have selected how to display the data, we need to select a data source. Remember that we turned on the share application resources as first step of the blog? We are now going to add the application here to use the resource. Select the ‘Add Application’ option.
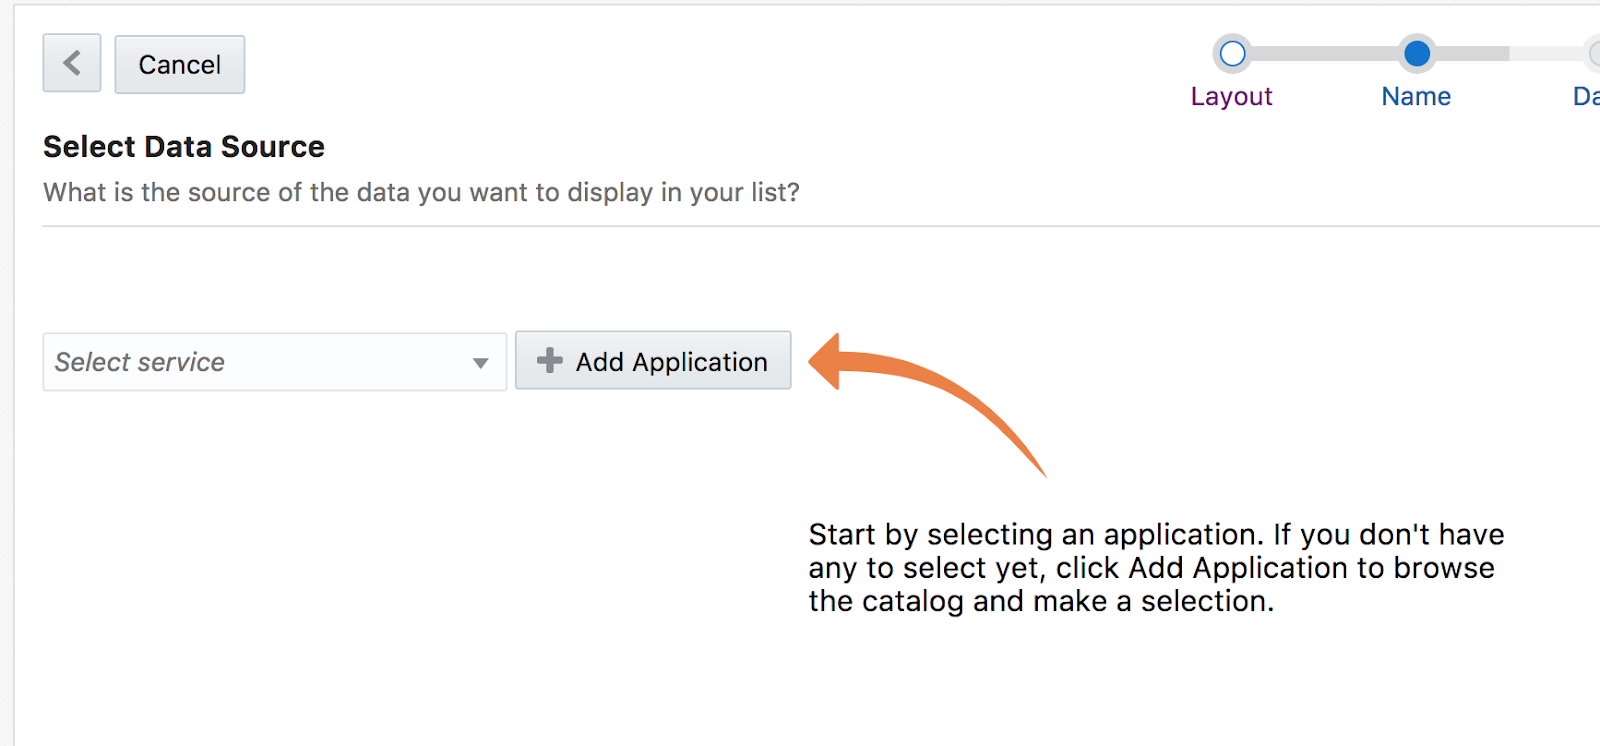
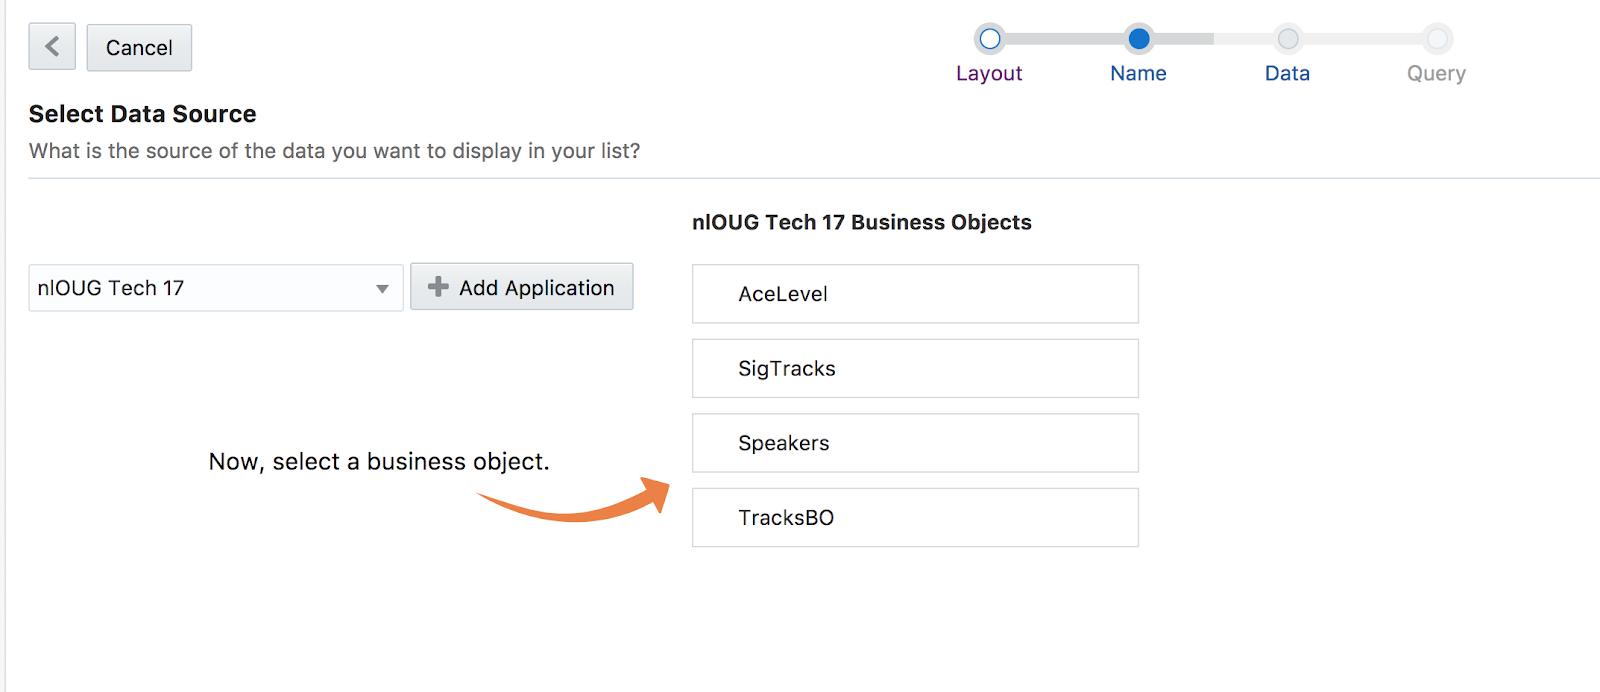
In the next screen we select the app we want to use:

And after that we can select business objects from that application.
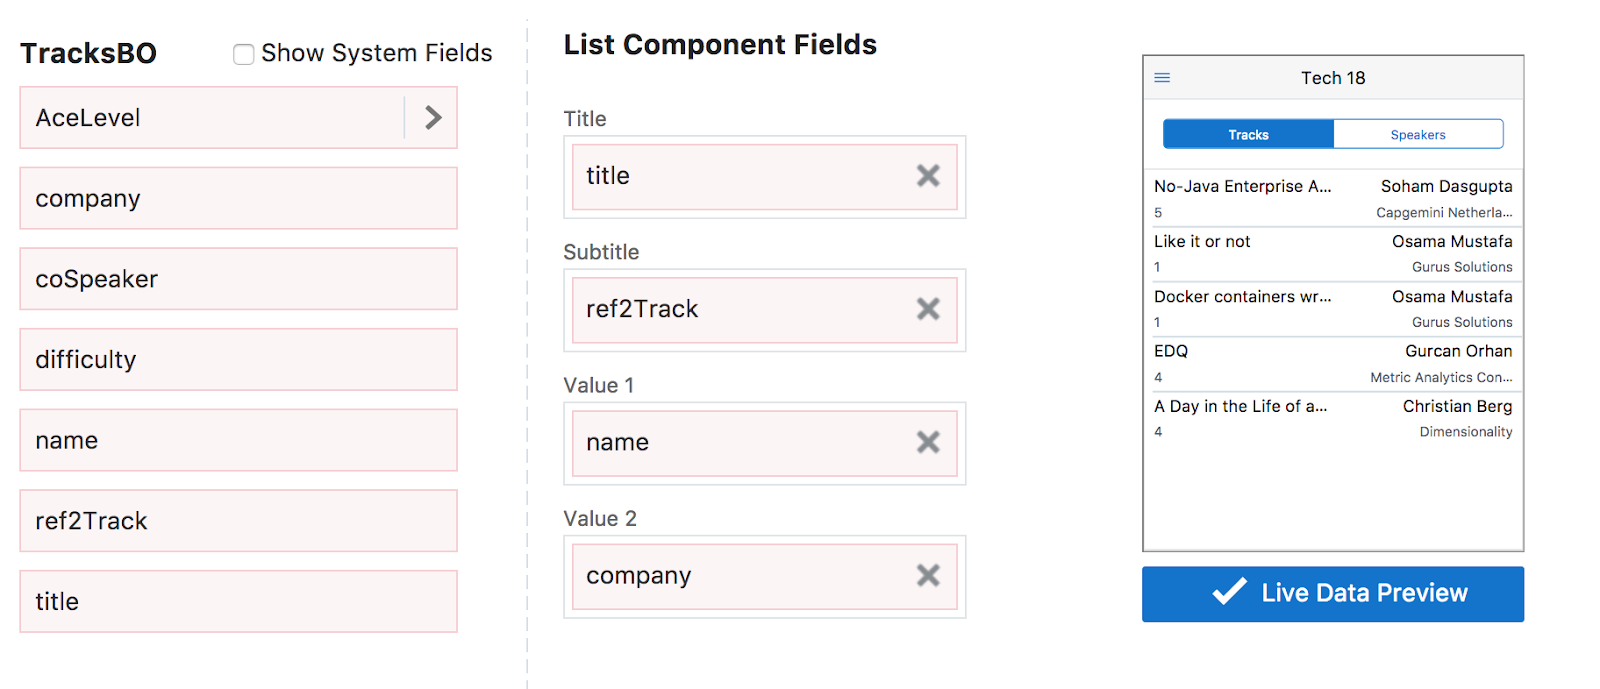
After Drag & Drop’ing all the fields we want to show. You can see the data in action, by pressing the ‘Live Data Preview’:
With this we also completed the wizard to add the data to the screen and we can press finish to exit the wizard.
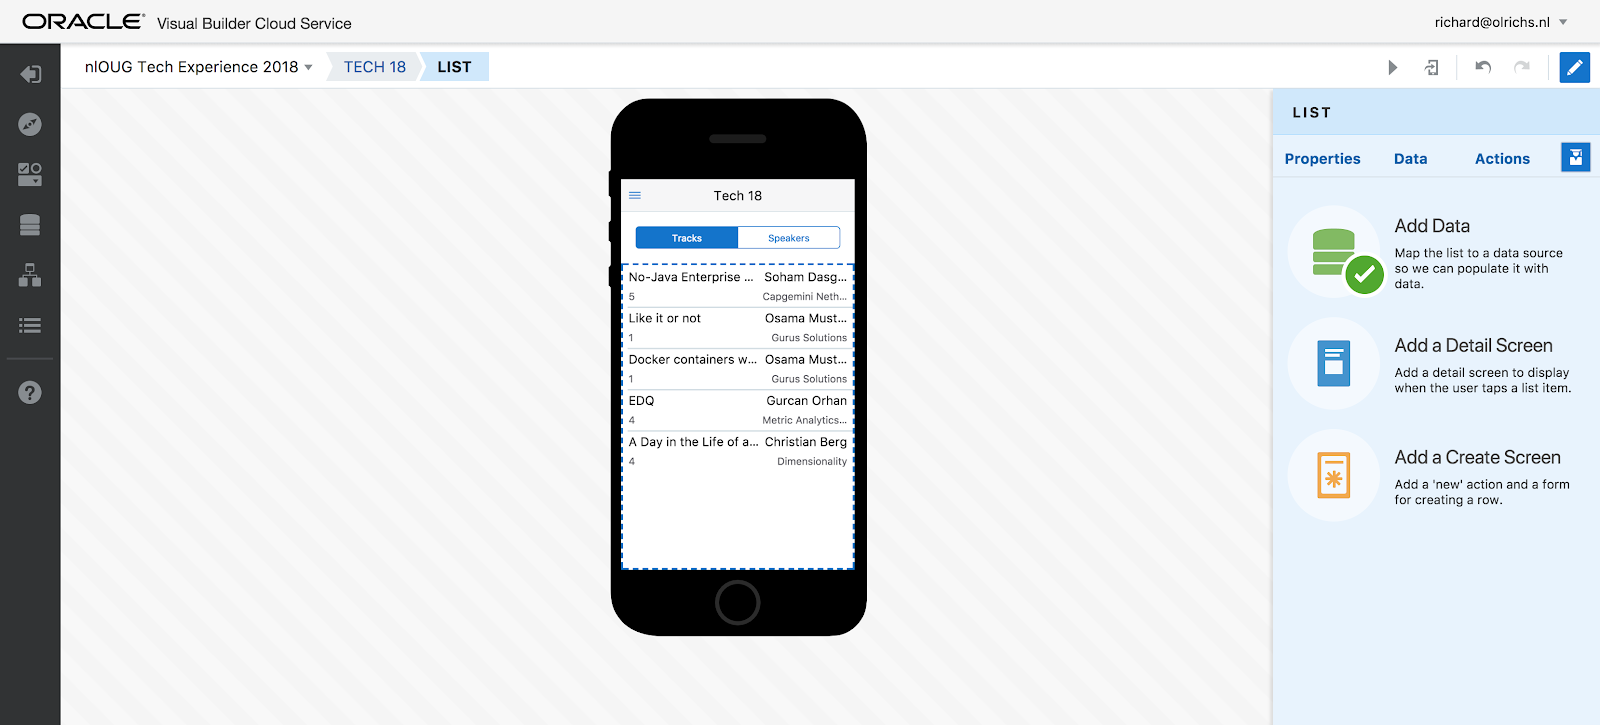
The phone app now looks like above, but we want to add a detail screen to this page. So as you might expect we need to select ‘Add a Detail Screen’.
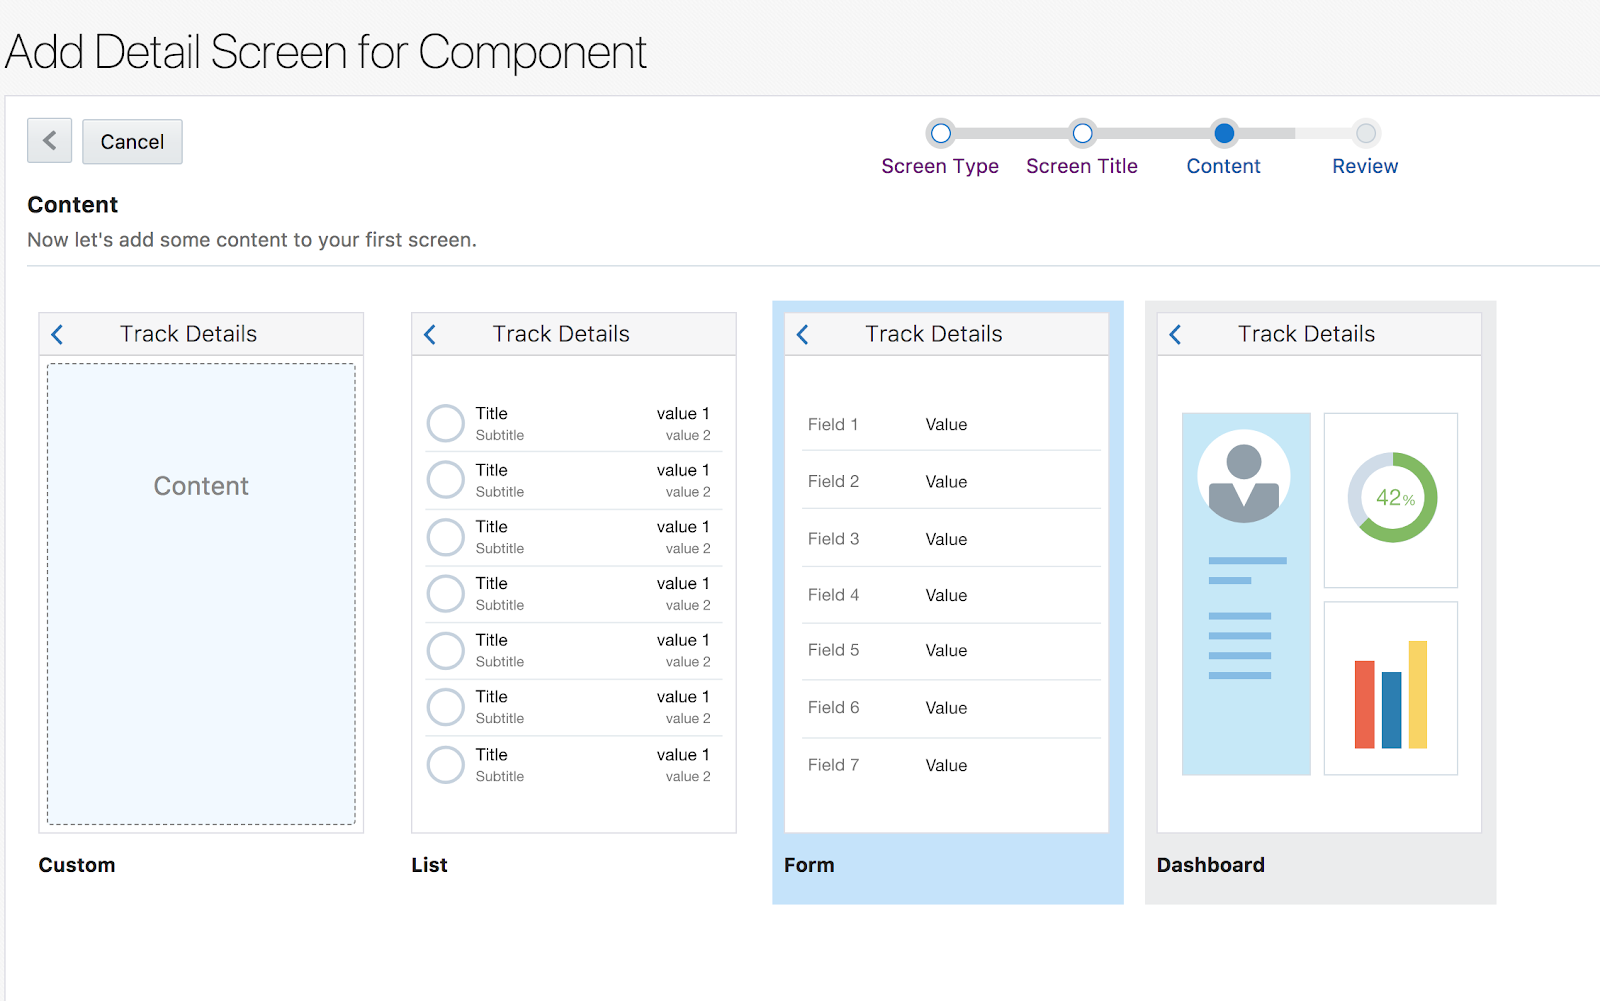
In the wizard/train I select a simple screen, enter ‘Track Details’ as title and select form content.
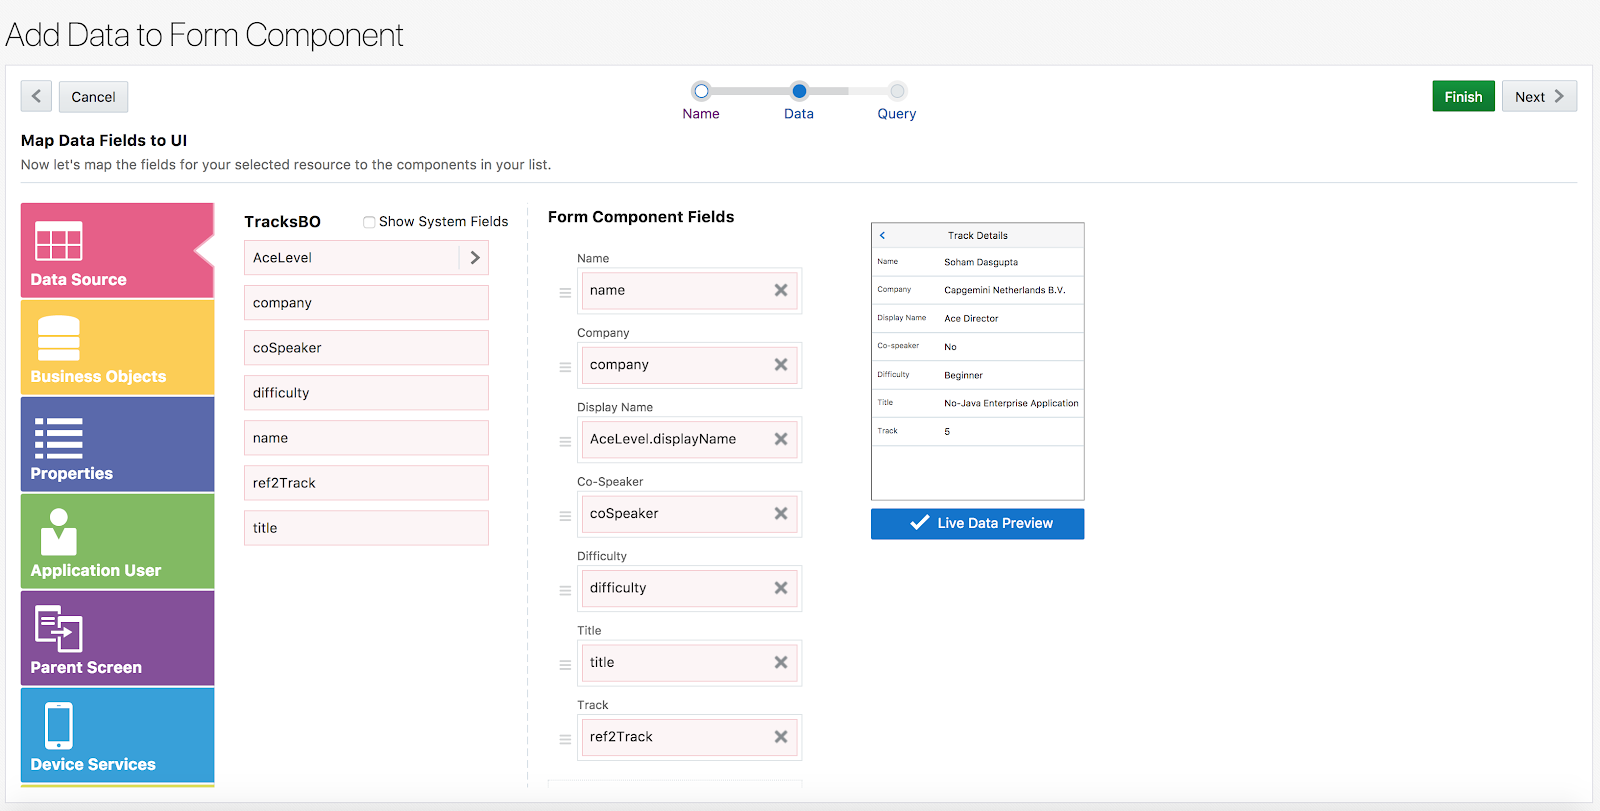
After this we go to the detail screen and again select the ‘Add Data’ option.
Now we go through the wizard again, to drag & drop fields on the form component, but as you can see we drop more components on this form then on the previous layout. In the parent page we had a form that displayed 4 fields, here we are going to show more details:
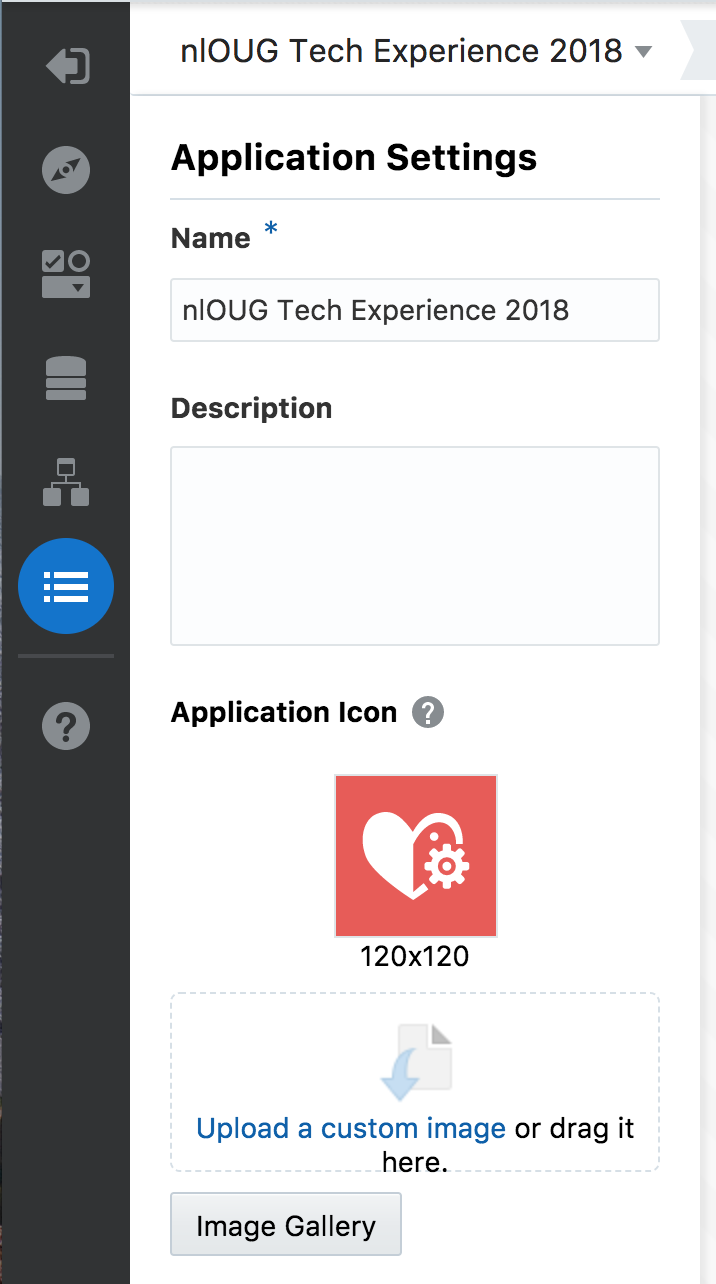
After setting up these two pages, we still want to change the icon for our app. So go to the Application Settings. There we find the application icon and we change it to our desired logo.
Now we can run our app in the test mode. We can select the layout and the phone.
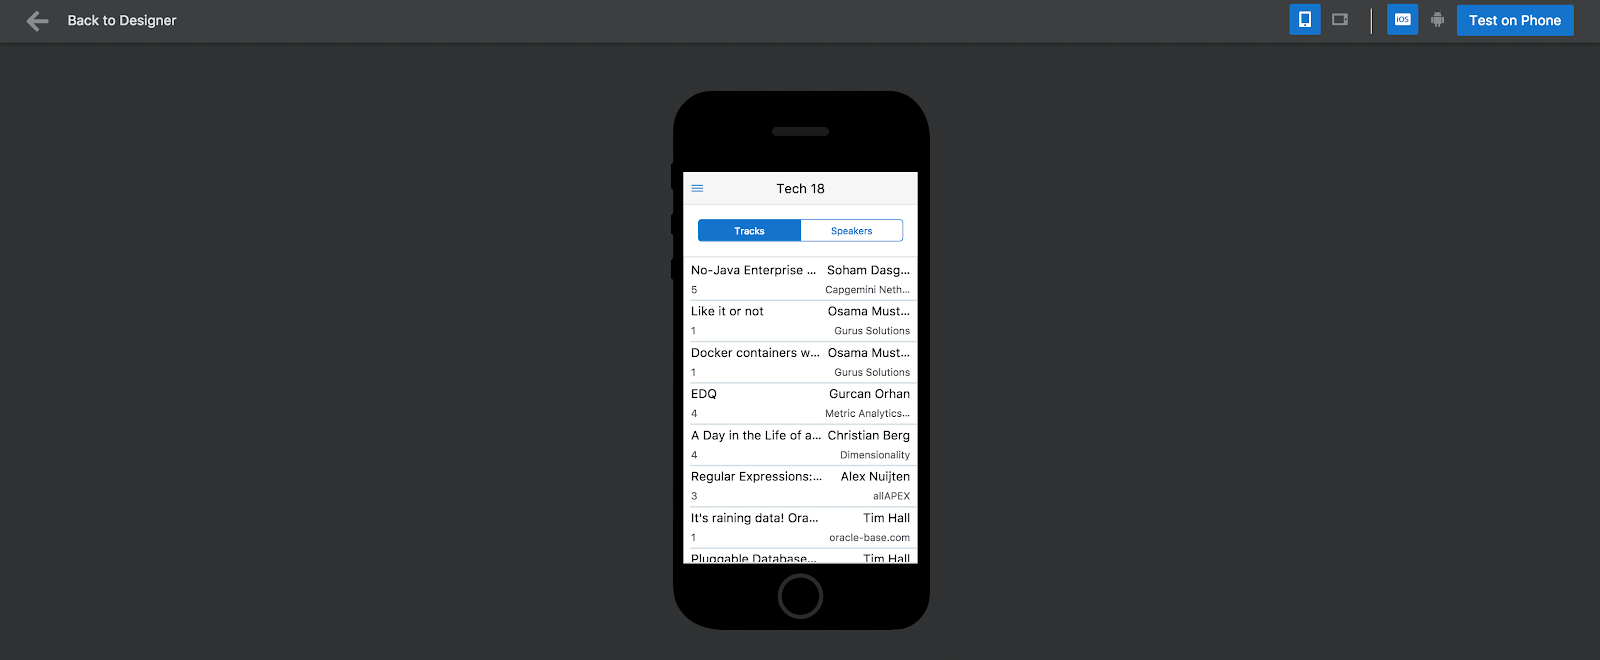
However, you can also ‘Test on Phone’, by pressing this button, a QR code is generated.

This QR code enables you to test your application on your phone. You need the MAX app for this. However, this is a clever trick by Oracle. You download the special MAX app and then add your application by scanning this code.
This way you can actually test the app on your phone and see the native behaviour, but you do not need to go through the trouble of getting your app accepted on either the play store or the app store.
A great way for easy testing on your phone!
No comments:
Post a Comment