Pages

Jarvis Pizzeria: Handle SOAP Faults within PCS

As we are very optimistic developer we started out with modeling and testing the happy flow of our Jarvis pizzeria. But as experience learns it is the big bad world that obliges us to deal with both expected and unexpected failures. This blog post we will look into the handling of SOAP faults that PCS has to offer out-of-the-box.


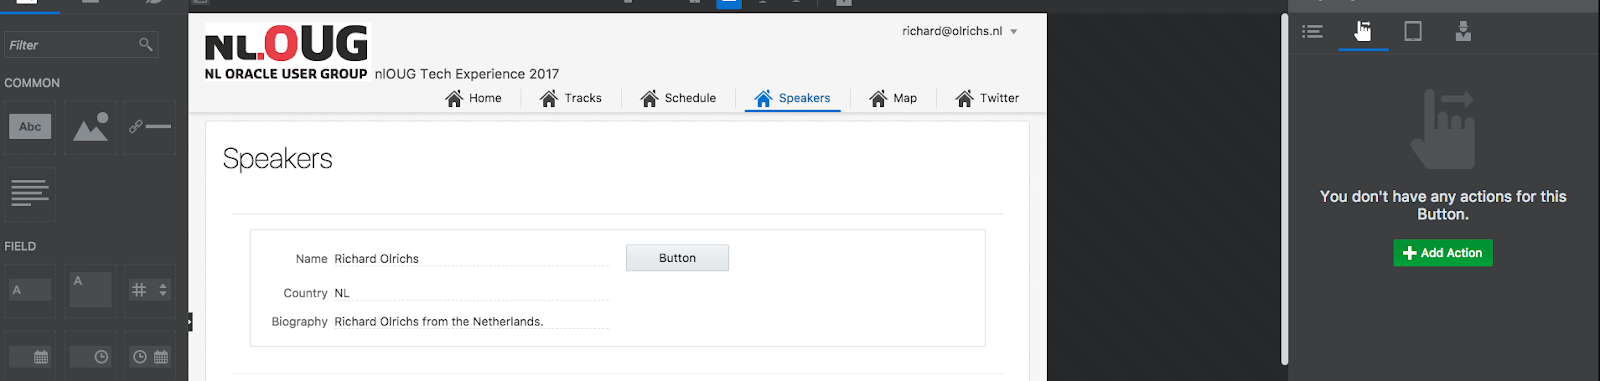
As a starting point we have created a basic process with one service call:
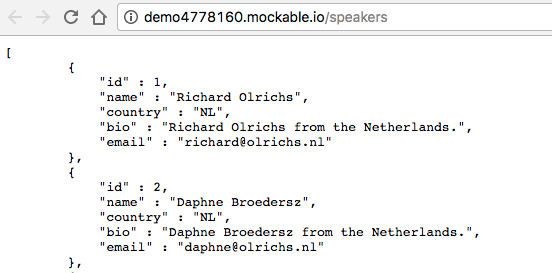
This SOAP Fault service is connected to mockable.io service that is configured to throw back a remote fault, i.e. the invoked service endpoint cannot be reached. Let’s deploy the process, start an instance and see in the workspace what has happened.
Note: to use the OOTB error handling leave the fault policy checkbox marked during deployment:


The graphical view shows that that the process, as expected, ran into a faulted state:


Luckily for us the engine indicated the SOAP fault as “Faulted recoverable”:


First take a look at the tree structure of the process:


The “Instance has started the activity” shows the following request message:
All the “Instance error” show the following message:


The service has been called three consecutive times with intermediate breaks of 5 and 10 seconds respectively. The process now can be fixed with the buttons that have been discussed in a previous blog post.


Now lets deploy the exact same process but without the fault policies.
Running the process show the exact same graphical view as the one above:


However, the details section of the failure shows different data:


Note that the Status is different, without the fault policies the process is in an exception state.
Looking at the tree structure of the process we see the following:


Does this mean the process is dead right now? Well yes, more or less it is. We have two options to choose from:


Both of these options won’t bring back this process instance back to life.


The handling of SOAP faults within PCS is extremely powerful, given that you have turned on the fault policies. When the process encounters a runtime error it automatically tries to recover the fault while at the same time there is an extensive set of tools at one’s disposal to get the instance recovered. One can simply retry the service call, change instance variables, simply continue or skip the faulted activity or suspend the instance temporarily. Be aware that these powerful tools can also work adversely when using them wrong. But as always...with great power comes great responsibility.

Are there any scenarios conceivable where a developer should turn off the fault policies? The disadvantage of turning on fault-policies is that the fault policies are turned on for the entire application. If one - for whatever reason - wants to build a proprietary error handling framework than this feature should be turned off. Maybe we can see in the nearby future an opportunity to configure the fault policies in a more fine grained manner, to make this feature more powerful. Then again, compared to the on-premises error handling we’d have to say that this is a big leap forward again!

Jarvis Pizzeria: Test against the Development or Production environment

Within PCS there are actually two different environments, a development environment and the production environment. Once you have deployed your application it is available in the production environment as a certain version of the application. However, you might want to test your application before you deploy a new version. You can also test your environment against the so called ‘development environment’.

The blue button bar has a Test as well as an Deploy button on the top right.

The Deploy button takes you to the normal deployment screen.
In here you can deploy a certain version of your application, start an instance and see how it behaves. However, this is the production version of you application, calling real integrations.
We have already shown in previous blogs how to start an instance in production.


In this example a REST call, as a result instance #283 has been started.

However, when we press Test instead of Deploy on the top right blue bar, this takes us to a different screen.

We see that we can try our application in the Workspace. When pressing the green button that opens up the following home screen.
You can see that on the top there is a blue bar which says ‘Testing Mode’, you can toggle between the testing (or development environment) and the production environment.
On the center you can start to track instances by clicking the right blue ‘Track Instances’ button.
You can start instances of your application if you have a form start on the left, however, we use a message start. So how do we start an instance in the development mode while we use a message start?
For this we need to set a header in our request, the param ‘pcs_mode’ needs to be set to ‘dev’ in the header to get the information from development instead of production! Here we do a call again to the process-definitions to find out the processDefId for the development instance. For a more detailed explanation of how the REST call works against PCS, see this previous blog entry.


Once we got the processDefId, you can see it has player~ in front of it in this case, we do a call just like we are used to for the production instances. As we can see from the screenshot below, instance #277 is started in the development environment.

So now that we have started the instance, we will go to the ‘track instances’ page. If we switch testing off on this page, it means that we see production data. As expected, we see our instance #283 that we started earlier.
Also notice how the bar on the top of our screen is now green, instead of the blue we saw earlier.

When we switch testing on, we go into the testing mode and see the data from the development environment.


As you can see here, we see our instance #277 that we created in the development environment!

VBCS: Action Handlers, send an email

Within VBCS, Virtual Builder Cloud Service, you can add custom actions in menus or on buttons. We will explore this feature in this blog by allowing people who visit our Tech17 application to send an email to a speaker.


Within the REST service, I added the email field, so it does now come back in the collection as well. I changed the extension and business objects accordingly, I will not cover that in this blog post.


The result of the service now looks something like this.


On the existing Speakers page, from the common section, I drag & drop a button into the list view item. On the right hand side, I select the Action tab, the hand with the arrow next to the pointing index finger.


When clicking the green ‘Add Action’ button, you see a couple of predefined actions. However, we want to do a custom action, so we click the ‘Add Custom Action’.


This brings us to the custom action screen, in where we can choose out of a lot predefined custom actions. Using this actions you can define a flow of actions that you want to happen when pressing the button. Under Miscellaneous, there is and ‘Compose Email’ option, which I drag and drop into the center.


The ‘Compose Email’ dialog will appear.


In the dialog, I can either enter data myself or we can select it. When clicking the data icon, I select the Speaker Business Object, after which the E-mail field is automatically selected, because it is configured as mail property.


It will be selected and entered in the inputfield.


After this, I add the ‘Message about the nlOUG’ as subject. I want to have a convenience in the body, by starting with the Speakers name, which I can select again from the business object.


After this, pressing Done on the top right will bring us back to the speaker page.


Now that the page is done, we can press the run icon and run the page to test our new functionality.


Pressing the ‘Send Email’ button next to my own name, opens the email client on my laptop and start a new email. It will fill the To, Subject and even the name in the start of the body!


Jarvis Pizzeria: Using an imported XSD in PCS

In this blog post we mention issues with enums and the usage of imported types on web forms. This was on version '17.2.3'. A re-test on '18.1.3' proved that the issues have been solved. In the post ‘Import the 12c On-premises Preparation Process’ we saw the Business Types that were imported (also shown here)
We already stated that we had an issue with enumerations. But is this the only issue with the xsd? Unfortunately not, as will become clear soon.
Making task forms was not part of the import blog, however, in this blog we are going to do this. We will do this based on the imported xsd. So let's get started. Create a New Web Form
Give the Form a name and click the Create button.
Because the ‘Open Immediately’ check is on, the new Form opens. In the bottom right corner is the Business Types Palette. In here we see the imported Business Types that are based on the used xsd. For this form we need the PizzaPreparationBO. Drag and Drop this on the canvas.
The following form is generated. All elements of the business type are there. The ingredients are placed in a repeatable section.
Although the form is not very beautiful yet, for now, we let it be what it is. We're going to test first before we make the form look better.
Save the form and open the created process to connect the form to the tasks.
We have attached the same form to all tasks in the process. After that open the Data Association for the task. The images below show the input and output mapping used for the ‘Prepare Pizza Crust’ task.


Save and Publish the application.
Enter a comment (it’s mandatory).
Next we Deploy the application.
Details about the deployment of an application can be found in a separate Jarvis blog and starting an instance with SoapUI can be found be found in another Jarvis blog.
After running a test with SoapUI a new running instance is created. On the tasks page the first task of the running instance can be found.
Open the task by clicking on it. The task opens. But to our surprise, not all data is there. The list of ingredients is missing.
Let’s analyse this a bit further. For this go to the tracking page. The instance can also be found there.
Open it by clicking on it. The Graphical view shows that the first task is currently active.
Switch to the Tree view.
Then select the task payload (instance entered the activity). It might be a surprise but the list with ingredients is send to the task, so why is it not displayed?
Is it a bug in the used version (17.2.3)? And will it be fixed in a later release? Or is it a design decision? Only time can tell.
In a coming blog we will describe a way to overcome this issue.