Tree bindings can be very handy, for example to combine details in the same row as the master. Let’s assume we have the following starting point based on the HR schema:

We see the department in a form layout with navigation buttons, with a table under the form showing information about the employees. As you can see in the screenshot below in the ApplicationModule, there is also a Jobs detail under the EmployeeView.

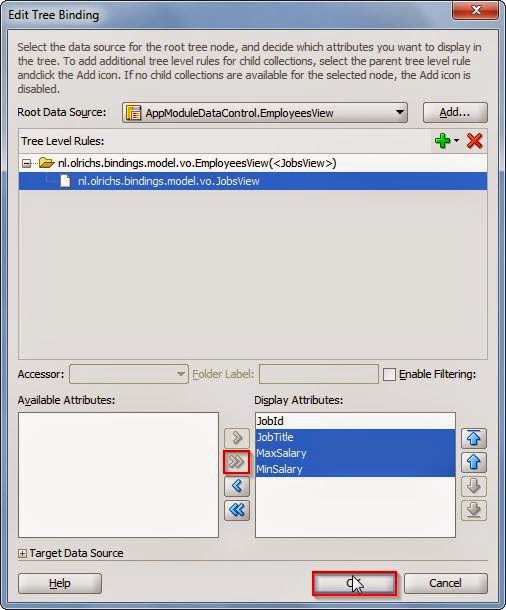
If you go to the bindings on the page, you see the Tree Binding ‘EmployeesView’. You can edit the Tree binding very easily through the overview of the binding page. If we add the JobsView as detail this will be available in the page as well.

Don’t forget to shuffle the attributes that you need to the right:
After pressing ok, the source of the PageDef should now look something like this:

You see that the first nodeDefinition in the tree has gained an Accessors element, in this Accessors element there is an item with the name JobsView. We can now use this accessor in our table in the page as well. To illustrate I add two new columns to the table.

The editor does not really understand this, so you do not get any help from the IDE. You can see that the EL expression to the hints of the EmployeeView is the same, but after that we use the accessor value to navigate to that nodeDefinition in the Tree, after which we enter the value from the AttrName inside this nodeDefinition.
The value itself however, we need to access through the row. You can see the EL expression in the value of the outputText. After the row we again first use the accessor value but then go to the bindings, after the bindings we enter the AttrName value and we end the EL expression with the inputValue.
On run time this results in the two extra added columns: