Pages

Jarvis Pizzeria: Deployment and using the workspace

Having played around with all the features PCS has to offer it is now time to see some action. In this blog we will show you how to deploy your application, start the application and see how it behaves within the workspace.

But first of all, we need to have a application that is ready to deploy. In other words, our minimal deployable product consists of an application without any errors. Pressing the validate button in the top-right corner will tell you the current state of the implementation.

Unfortunately, we ran into a bunch of errors! Mostly due to missing implementations of service calls. The good thing however is the “Fix” link.


In contrast to JDeveloper, clicking the “Fix”-link will bring you directly to the - in this scenario - properties screen to fix the issue. Oops, we forgot to select a ruleset for our business rule activity.


Having fixed all the issues it is now time to show the first rays of sunlight to our Jarvis Pizzeria application. Clicking the “Deploy”-button in the top right corner will bring us to the tab where we can deploy our latest-and-greatest published version of Jarvis.

In the screen that follows the user can click “Deploy new version” in the top right corner.


This brings us a popup where we can select which snapshot we want to deploy. We choose to deploy our last published project.


Clicking at “Customize” brings us to the next screen within the popup:

In here you can customize your services that are used. Obviously, the endpoints can differ from environment to environment. Most likely your development environment will mock the service endpoints, whereas from you acceptance environment you connect to the live services. The question is, can we use configuration plans as we know from the on-premises soa composite applications? So far, we have found nothing about configuration plans in the documentation. Maybe something to add for a future release?

Clicking the “Validate” button will check the application for design-time errors. Luckily in our examples there are only warnings, which enables us to continue.


The options to select from are shown below. These options are the familiar ones, that one might known from the Jdeveloper deployment wizard. The only new option that has been added is the choice whether this application should use fault policies. Does this mean that we don’t have to struggle with creating the fault-policies and fault-binding files? Let’s see what happens.


Now it’s time to start our application and see how it behaves. As one might recall, any PCS application can be started with either a SOAP message or a REST call, hence we cannot start it manually from the workspace. An application can be started manually if the start node is a manual activity (for example a manual task). But no worries, in this SOAP blog post (LINK to SOAPUI post) and this REST (LINK to REST post) blog post we explained how to start the application.


In this case we choose to create a new SoapUI project and import our WSDL. In the image below the WSDL is imported and the authentication credentials are added.
Now we are going to open the Workspace to see if we can find our instance.
The starting screen of the workspace looks like the picture below. One might notice two things:
  • There is blue bar in the top of the screen which let us choose if we want to be in testing mode. Not sure about the exact meaning of this option, Oracle’s documentation is clear about it: 
“Note the Testing Mode indicator at the top of the page. When using Testing mode, you can only access the data generated by the applications activated to the test partition. This data is isolated from data in the production environment. “
There happens to be two partitions.The test partition and the production partition. In a future post we will elaborate on this.
Below the blue bar there is Test (1.0) application that can be started. Note, that this is not the application we just deployed. This is a testing project in which we start an application with a manual task.

We click the “Track Instances” button at the right side of the screen.
There we see our instance we just started via SoapUI.
However theicon indicates the instance is running, looking at the process flow, it seems to hang at the “End Delivery” callback.

The Delivery process is a standalone process which we invoke with a process-as-a-service call. If we remove the search filter, we can look for errored instances within the Delivery process.

There it is, the Delivery process is in an errored state, however the engine has indicated the error as “Recoverable”, indicated by the icon:
When clicking the errored instance we get the following screen


Unfortunately the Order Info step went wrong, so let's take a look into the tree view to see what the error looks like:

That’s interesting. The service call went wrong, the error is indicated as recoverable and the service call is retried after ten seconds. That looks like the fault policies are doing their job!

But looking at the configuration settings, we could not find the location to configure the fault policies. An interesting feature for the fault policies would to define them in a more granular way. In other words, for a certain service invocation error one would do two retries before human intervention is entered, whereas for a another service it might come in handy to go directly to human intervention without doing a retry.

The recovery options are divided into the following categories:
  • Abort 
  • Retry 
  • Continue 
  • Manipulate the flow 

That gives the operator great power to fix instances that are in an errored state. The abort option exits the current process, the retry option does a retry on the faulted activity and the continue option just “skips” the faulted activity. Note that the latter option is quite dangerous as the faulted service have not returned any data to the process which - when not modeled properly - will result in a selection failure later on.

We choose to manipulate the flow, another “dangerous” option as it gives you the power to remodel the process at runtime.

In the image below we actually simulate the “Continue”-option, telling the engine to skip the faulted activity and go to “AnnounceOrder”. It also gives you the ability to pick a data object and manipulate the data. Lets resume the flow.


And all of a sudden, we have a successful flow!

And also our main flow has ended successfully:


This wraps up our blog about deploying and running our application and a first glance at PCS’ error recovery possibilities. Although, there are many similarities with the on-premises BPM version, there are also some differences. We have seen differences in the usage of a config plan, setting up fault policies and the flexibility one is offered in recovering runtime errors.

Jarvis Pizzeria: Using the REST interface to start a Process

In this previous blog, we already explained how you can start your process from a SOAP interface. It is also possible to do this with a REST call. For this you need to find out a couple of things about your process after which you can do a post on the Oracle API to start the process. You can use any REST client you want, in this example we use Postman.
First of all, you need to query the process definitions API. This can be found by putting /bpm/api/4.0/process-definitions after the baseUrl, in our example: https://pcs-jarvis18.process.us2.oraclecloud.com/bpm/api/4.0/process-definitions

Luckily PCS does not allow just anyone to see this information. We need to use Basic Auth and enter our username and password.


After pressing the update request button, the headers are updated with the Authorization information.


Now when we press send, we will get back the information from the definitions that we are looking for. You get information about all the processes that are within this PCS domain.  


From this result, we will focus on the PizzaPreparationProcess 2.0. The information we need to start the process, is the processDefId, the servicename, the operation and the input params. The input params have to be valid accordingly to the schema that has been send back. When the input params are not correct, you will receive an error, especially when using complex input it can be a challenge to write this in json. There are good tools, like jsonlint out there to help you validate your json and remove whitespace (this is necessary). With some help and the above tips from Lonneke, who reviewed the input, after which it worked perfectly!
It might be helpful if Oracle was able to send a more clear schema back, instead of what you see above.   

To actually start the process, we will need to call the processes api, this is the baseUrl extended with /bpm/api/4.0/processes. In our case: https://pcs-jarvis18.process.us2.oraclecloud.com/bpm/api/4.0/processes


We do not want to do a GET anymore, but a POST.


This will result in a started instance, in our case instance #167.

VBCS: See all Projects

When you are collaborating in VBCS, Visual Builder Cloud Service, it can be tricky when you work together on one identitydomain. For example, Daphne created an application for us to demo on OOW17. She is doing the first part of the demo and was testing our demo script. Now that she is done, I can take over and prepare the second part of the demo script.


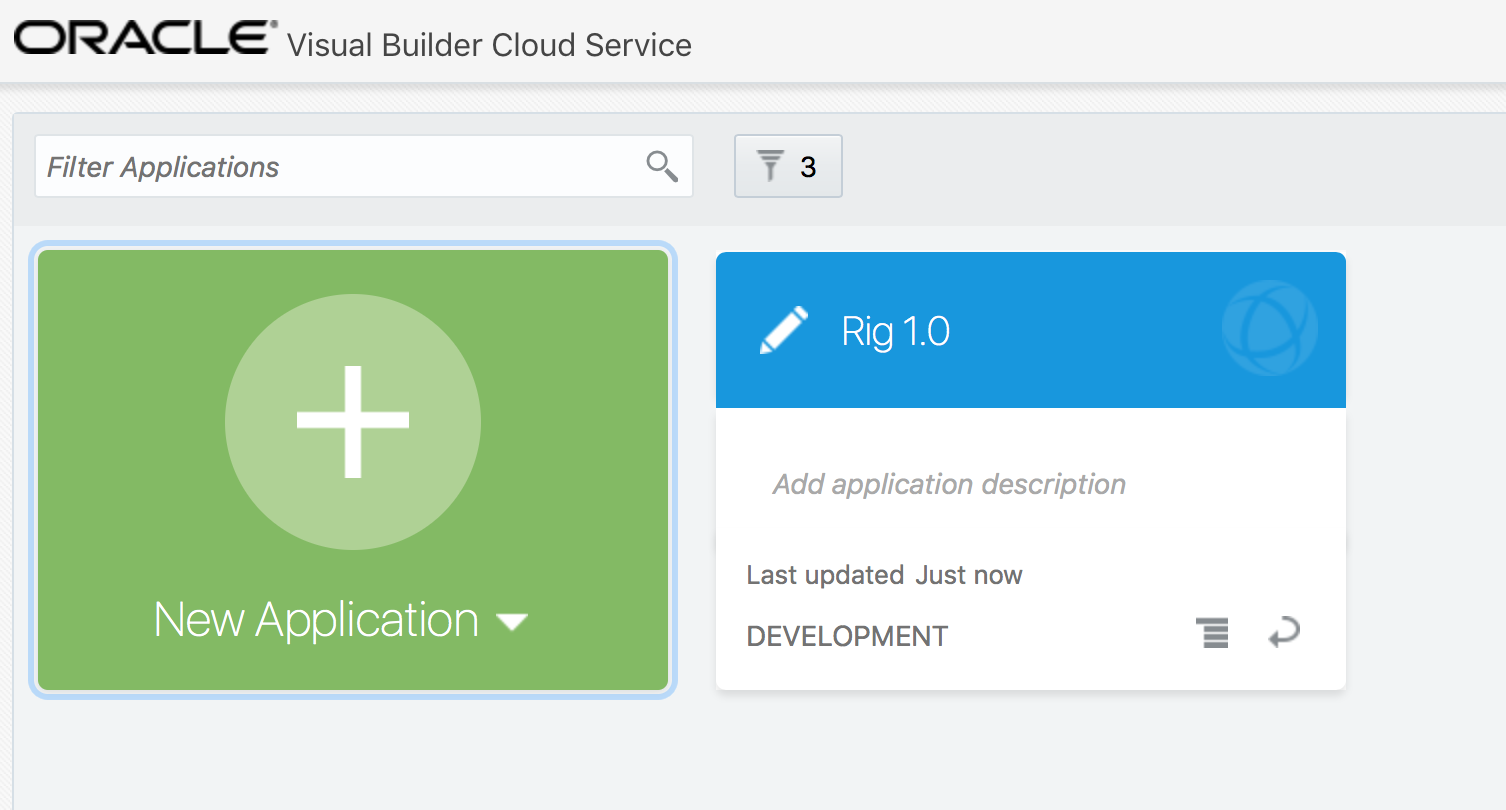
However, where is the application? I only see my own application.   


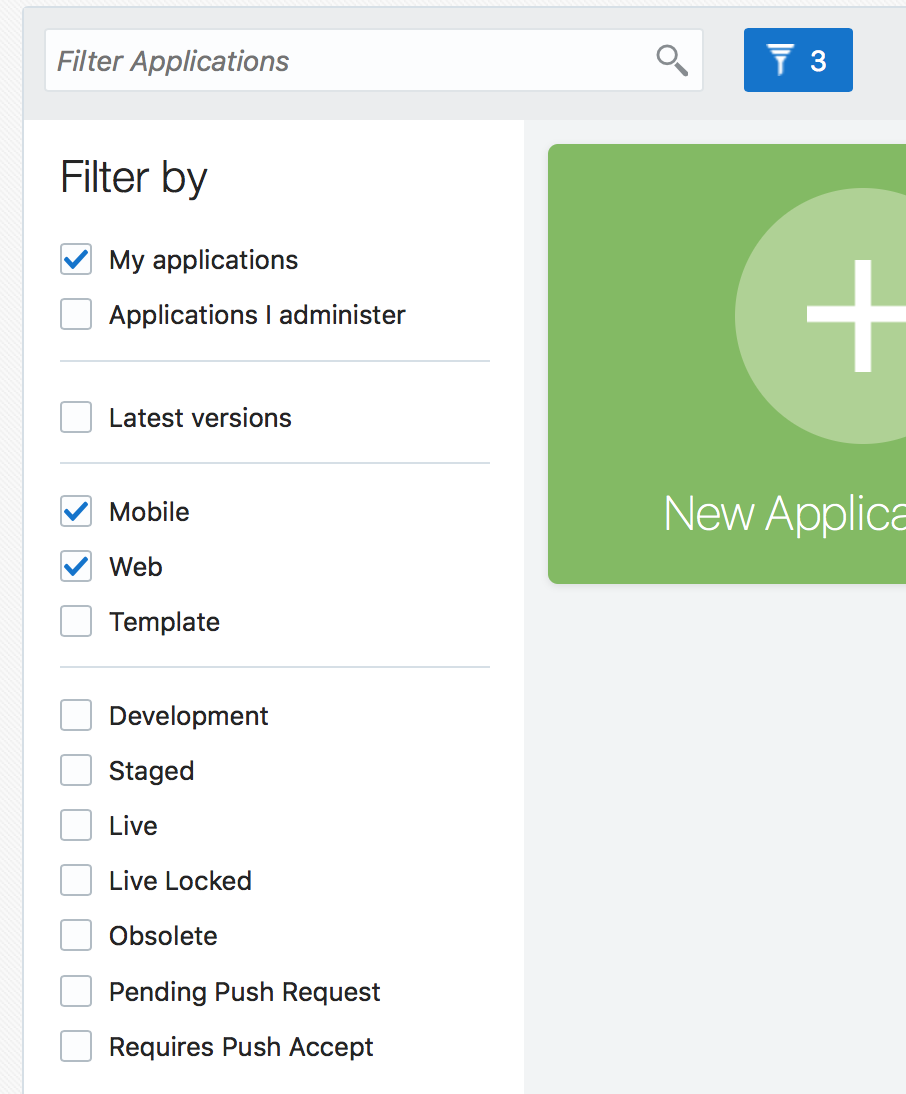
Well, the thing is, the default filter is showing only your own applications. The filter can be opened by clicking the filter icon with the number, in this case three, next to it. It will open the filter on the left hand side.


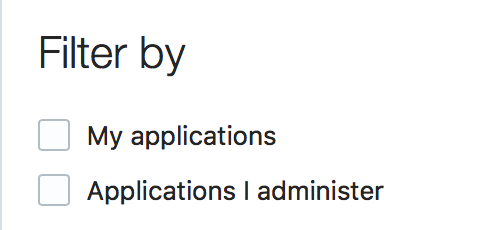
To see all the applications, I unchecked the ‘My applications’ checkbox.


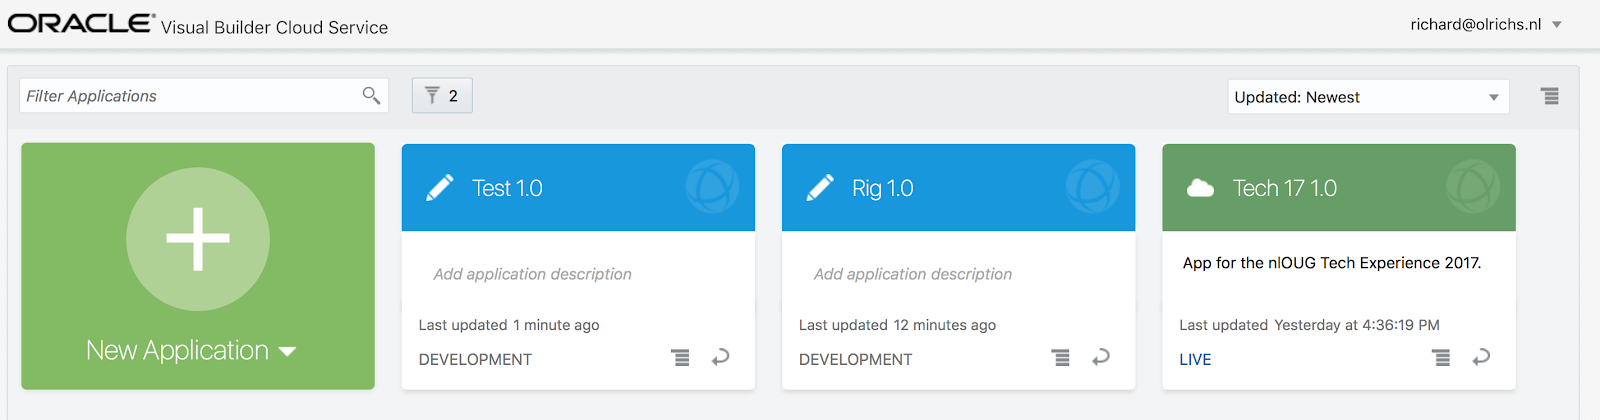
Which results in more extended overview of applications, I suddenly see the Test 1.0 and the Tech 17 1.0 application as well.


Now, after adjusting the filter, I can start working on my part of the demo script.


Jarvis Pizzeria: Using the SOAP interface to start a Process

We as old-fashioned SOA/BPM Suite developers, are used to test deployed services using tools like SoapUI. In this blog post, we will show you how to start a Process in the Oracle Process Cloud from the SOAP UI interface.
On premises with SOA or BPM we used to start by obtaining the required wsdl from the Enterprise Manager.
However, for PCS there is no such thing as an Enterprise Manager, so how do we get the WSDL?
In the top right corner of the PCS Composer there is a ‘Management’ button.
After selecting this button and entering User Credentials, click the OK button to go on.
The ‘Manage Deployed Applications’ screen appears. From here it is possible to for example undeploy a deployed application. It is also possible to get the associated wsdl through the Management Console. Click the action button of the deployed application to get a list of available actions. Then select ‘Web Services’ to get the exposed wsdl.
https://lh3.googleusercontent.com/W98dZ-yH4XI4s13EYy0FvENoKXH1KIwzs60CVYwC8gjJLdcgCRI_yVDPzNwkx-_33LgunnsVAH8rJxSnGl_JSXQ4VDDsGk6s6KoIbB_kjrpbvgAO0e_eYGQf3LLlUv5aobZk7RYbQBzGC1XuSQ
https://lh6.googleusercontent.com/apyPaj2Y5W1uuijEyMB0OyUNW5OpjH0k2tJi8DjD9uAeu16fYkIqxFw5Dd1BGbG6LrhoWC3rQLqOn8mOClwrcROHoS-YZL6nn1SzV14WiV8-sG2GpkaSx8_j3PDOhLauGbXVt7d2cXP5qlHHZQ
Copy this wsdl for use in SoapUI (or any other SOAP interface supporting tool). In SoapUI there is still one tiny thing that should happen, namely authorization. You can not call a PCS process without authenticating. Authentication is possible by using the Basic Authorization in SoapUI
SoapUI fills the request message for us, so all that is left is to input some data with which we want to start the process instance. Once the instance is created they are visible on the tracking page.

That is all there is to it, once you know how to get the wsdl, it works just like you expect from a SOAP service/endpoint.


Jarvis Pizzeria: Decision Model in the Delivery Process

To make the delivery of the pizzas to our customer, we need to decide how to deliver the pizzas. In our process we’ve already got the order data, so we know what the order is and where it needs to be delivered, but what is the best way to deliver the pizzas?
We will create a decision model in PCS to help us with this decision. In the delivery process we will call the decision model like a service and use the answer to make the correct decision.


The input for the decision model will be the amount of pizzas and the distance to the customer. Based on these data we will decide to either use a bike, moped or car to do the delivery. A very common decision to make in the Netherlands, since we love our bikes and often deliver pizzas by bike rather than by car.


We start with going to the PCS home. All the way out of the jarvis application and on this home menu we click the create button. Here we see that besides new applications, we can also create a new decision model. This means the decision is not coupled directly to the application with our processes, but it is a stand alone decision model.


When creating the decision model a name, description and workspace is entered after which we can open the model.


The Decision Model uses DMN, Decision Model and Notation. For those using Business Rules on-prem, this is very familiar to Business Rules, but slightly different. Oracle advises that if you can use DMN instead of Oracle Business Rules, you should!
DMN is a standard published by the Object Management Group (OMG). It is a standard approach for describing and modeling repeatable decisions within organizations to ensure that decision models are interchangeable across organizations.
There is also an option to use FEEL, Friendly Enough Expression Language. We will explore this option and how to use this in a separate blog. For now we will create a decision table to make the decision for us.


After creating the model, there is a 5 step guideline how to build it. First we need to add the decision, after which we define the input. Based on the input we can start modelling the decision, this is the step where we model the logic, the heart of our decision model.
Before deploying, running and using our decision model, we can test it internally in the tester. After we are satisfied with the results, we can create a service to invoke the decision model.


We start with creating the decision, by clicking the add icon.


In the creation of the decision we will give it a name, description and some general information. On the right we choose Decision Table.


After the creation of the decision, we see a couple of options to use within the decision.


In this case we want to use the Decision Table.


On the top right hand side of the table, there are options to add columns and rows:


However, we start with describing the output to the DeliveryMethod. When clicking on the yellow bar, we get a popup to configure this. We choose a List of Text values, and add the values Bike, Moped & Car.


This results in the following header of the yellow DeliveryMethod column:


After the output, it is time to configure the input. This happens with the help of the input data on the right hand side. When you click the grey arrow in the black bar, the input section will open.


In here we can add the input data, or even special definitions for the input of our decision. In this case, we just need two numbers as input, the distance to the customer and the amount of pizzas within the order.
So we only need the top section of the input data and use the add icon to start adding the input arguments and use the predefined number type for them.


Clicking the add icon will result in a fold out to the left and we can enter the name as well as the Data Type.


The result will be two number typed input arguments within the input data section.


Now that both the input and the output data are in place, it is time to start working on the logic within the decision table. First we add an extra column using the buttons on the top right. After that we use the first column for the amountOfPizzas variable and the second column for the DistanceToCustomer variable.


Now that the columns are all set up, we can start adding rows in the decision table. The table constantly evaluates the expressions & conditions, which can be helpful as well as annoying when working on the logic.


When you think you are done with the logic, make sure all the warnings are gone, especially the gap analysis can be quite helpful within the decision table.


The assumption we use for creating the logic in the decision model is that both the bike and the moped can carry orders up to 5 pizzas. It is just better to do the nearby deliveries on bike and the ones further away on the moped. If the order gets too big, or too far away, we need to use the car!
This results in the following, valid decision table:


Now that we have the logic of our decision table in place and all validations are passed, it is time to test the logic within our model. We can do this by clicking on the play button in the top right corner.


Clicking the play button will launch the tester of the Decision Model. We can enter input data manually, click on the ‘Start Test’ button and the result will be displayed.


For example, we have entered an amount of 4 pizzas and a distance of 1.


This will result in the output ‘bike’.


To use the DeliveryMethod within our process we need to create a service out of it so we can call it as a stand alone service. Expand the Services bar on the left hand side.


In here we click the ‘add’ icon to create a new Service.


As name we enter ‘getDeliveryMethod’.


This generates the following layout in which we need to define the input & output for the service.


We can Drag & Drop the input data from the input section on the right hand side into the input data section of the service. As output, we need to Drag & Drop the DeliveryMethod in the Decision section to the Output Decisions. The result will look like the picture below.


Now we need to deploy this. For this we click the blue ‘Deploy’ button on the top right.


After the Decision Model is successfully deployed, we can start using it from within our process. In the Delivery Process we select the predefined Decision Model.


Pressing the ‘add’ icon on the right of the Decision Model will bring up a popup to select the DM.


Since we’ve only got one DM yet, it is very easy to find and select. We name it the ‘DeliveryDM’. Since this only has one service, the just created ‘getDeliveryMethod’, this is automatically selected.


Now that we have our DM in place, we need to open the Data Associations. In here we need to map the correct data from the payload as input to the DM as well as the output to Data Objects within the process.


After this, the Decision Model is integrated within the Delivery Process and the output can be used in the gateway to decide how to do the delivery of the pizzas to the customer.


Conclusion
In our previous blog we saw how decisions can be implemented with rules. This feels a lot like the on-premises rules we know from Oracle Business Rules. However, now that we also explored the new Decision Model within PCS, it might be worth to shortly compare the two.
We favor the new Decision Model, because this is a stand-alone component, it feels like a microservice that can be developed, test and deployed as a separate component with its own lifecycle.
The Decision Model applies the standard DMN notation from the Object Management Group and it feels like a newly designed and ‘build from the ground’-feature as where the Business Rules feel more as the on-premises implementation that has been shipped with PCS as well.
This, together with the recommendation of Oracle to use DMN if possible, we feel that we could explicitly express to favor the Decision Model over the rules implementation.